Showing posts with label Holiday. Show all posts

Wednesday, October 09, 2013

DIY With Star: Easy Peasy Envelope Liners


Lined envelopes make a statement.  This simple detail makes a big impact on the recipient of your invitation, letter or card and gets them excited about whats inside.  Many high end invitations come with lined envelopes or offer them at an additional cost; however, if yours don't come with them, consider doing them yourself.  They are super simple to make and can be customized to any occasion.  They are great for invitations and cards of all kinds - weddings, showers, birthdays, thank yous and love notes :)  You can even spruce up store bought cards by adding liners yourself.

In addition to the envelopes, all you need is pretty paper (thinner is better, card stock isn't a great option for this project), a pencil, scissors and glue.  If you've ever perused the scrapbook isle at your local craft store you know there are tons of specialty paper options out there.  Paper Source also has stunning printed papers!  Wrapping paper is another great option and is actually what I used for the DIY photos below.  

DIY Instructions

1.Open your envelope and place it on your paper.  Using a pencil trace the envelope onto the paper (its fine to start about three inches from the bottom of the envelope).  Cut the traced portion out.
  
2. Slip it into the envelope and place it just below the adhesive strips.  

3. Carefully fold the envelope flap over and gently press on the crease.  This will crease the           insert.  
4. Glue the edges of the top part of the creased insert (do not glue the portion below the crease).  Make sure the glue is permanent (I used Zig 2 way glue).  Close the envelope and press down firmly. 

1. I recently purchased this adorable black and gold wrapping paper and thought it would be perfect to line an envelope with.  This paper is playful yet chic and would be perfect for a birthday party invitation!

2. I used a book page for this one and love how it turned out (for more inspiration see my previous post on using book pages in your wedding decor).  Sheet music or maps would work well too.  How cute would it be to line a destination wedding invitation with a map of the wedding location?! 

3. I love the way this silver glitter paper looks with the gray envelope.  It would be perfect for a holiday card or New Years Eve party invitation.

4. I used understated shimmer velum paper for this one.  It is elegant and would like nice lining a wedding invitation.

I used a neutral palette with black and metallic accents for my envelopes but consider using a bright envelope with a contrasting pattern.  Line your envelopes with a coordinating solid color or simple pattern for a more understated look.  For wedding invitations, consider using a variety of patterns in the same hue for the various envelopes (invitation, response card, etc.).  The possibilities are endless! 

Below are a few cute liner ideas that are totally doable!  Can you see what a difference they make on the overall presentation of the invitation?!  

Photo courtesy of Etsy shop Puddleduck Paper Co.


Photos courtesy of Etsy shop lanyapstudios

Happy crafting!

-Star

Thursday, July 04, 2013

Sterling Engagements Wishes: Happy 4th of July!

What a beautiful day it is to celebrate such a festive holiday!  Hoping you are able to get out, take the day off and enjoy some sunshine!

 
Photo courtesy of Examiner

The 4th of July is one my own all time favorite holidays for the sole purpose that I LOVE fireworks.  This year is an extra special one for me as I'm actually able to take the bulk of the afternoon and evening off.  So I'm going to share with you some holiday rules and guidelines that I made for myself for this special day.  Hoping it will encourage, inspire and excite you as much as it has me!
   
ӿ  Embrace the day: Do something a little different than what I usually do... 

ӿ  Be Kind: To yourself and others today, push yourself to somehow go the extra mile for you and for someone else in some way.  Even if you don't want to, it will come back.

ӿ  Have Fun: Be a little extra silly, laugh a lot and create memories with those around you to make this THE BEST 4TH EVER!

ӿ  Make New Friends:  Wish anyone you get the opportunity to a Happy 4th!  Whether it's a stranger on the street, a waitress at lunch or even a person you haven't met yet at the same party you are at.  Change their day, it's powerful and amazing and oh so rewarding.

ӿ  Be safe:  That's self explanatory!

Have a safe and Happy Holiday!

Thursday, February 14, 2013

Sterling Engagements Wishes: Happy Valentine's Day!

Happy Valentine's  Day!  As most of you know or are about to learn... I'm a hopeless romantic, so of course Valentine's Day is always a favorite of mine...

 Photo courtesy of deviantArt

I'm always inspired by love, affection and passion between people.  It's part of our business to be as wedding planners but also I am just as an individual.  Today as I sat down to write this post, I was inspired by so many things but here are a few of my favorites that I came across...

Love is....
Photo courtesy of deviantArt

 This one's amazing... 
Photo courtesy of  Speaking Beauty

Sweetness...

Photo courtesy of Pinterest
 So hot!

Photo courtesy of  Junebug Weddings

Just precious...

Photo courtesy of Twitter

And of course... my all time favorite!

Photo courtesy of Tumblr   

Have a happy day and wonderful evening however you celebrate! 

Friday, February 01, 2013

Star's Inspirations: The Perfect Valentine's Day Card

Valentine's Day is right around the corner which means I am on the hunt for the perfect card for my  dear husband.  Cards have always meant a lot to me, even back when I used to adorn them with macaroni.  I enjoy perusing the card isle of my favorite stationary shops and choosing the perfect card for the perfect person on the perfect occasion.  From time to time I even enjoy making my own cards.  

According to History.com, Valentine's Day has been celebrated for centuries in various countries throughout the world.  By the mid 18th century, friends and lovers of all social classes exchanged handwritten notes or small tokens of affection in the name of St. Valentine.  "According to the Greeting Card Association, an estimated 1 billion Valentine's Day cards are sent each year... Women purchase approximately 85% of all valentines" - History.com.  Although Valentine's Day can often seem like a cheesy holiday, I must admit, I love it!  I like the idea of taking one day in the middle of cold, gloomy February to express your love for others and feel loved as well.  It's also a good excuse to get a mani-pedi, wear a sexy red dress and if your lucky, get flowers and chocolates!

In previous years, my husband and I exchanged cards for every major event: birthdays, holidays, graduations, promotions, anniversaries, etc.  My hubby always chose a nice card and wrote a thoughtful message in it and I did the same until a few years ago when he suggested that we stop giving each other cards.  He felt that since we'd been together for a number of years, that a card for every occasion was unnecessary.  At first I was disappointed and a little sad, but when I really thought about it, I understood and actually kind of agreed; however, I wasn't ready to say goodbye to exchanging cards forever!  We compromised and decided on two cards a year: One for Valentine's Day and one for our Anniversary (the occasional love note is ok too :).  I kind of enjoy this new tradition because it makes these two cards mean so much more.  Now that we have a little one, I know I may not have the time to peruse the card isle like I used to, so I am shopping online.  I've found so many I love but I've narrowed it down to the following:

I'm slightly obsessed with Paper Source products, and their cards are no exception.  Love these! 

How fun is this check box/fill in the blank card?!


Photos courtesy of Paper Source

Papyrus' cards are always stunning.  They are so detailed and intricate that the recipient of the card can't help but feel special!
Photo courtesy of Papyrus 

Etsy is a great place to find super unique cards.  A few of these are sweet and a few are silly. Love them all!

Photos courtesy of (1) Etsy Shop PABD Elegance, (2) Etsy Shop jdeluce
(3) Etsy Shop StrangerDays, (4) Etsy Shop PABD Elegance

Whether you are single, in a relationship, engaged, or married, I hope you'll enjoy choosing the perfect card for a special someone.

XOXO,

Star

Monday, December 31, 2012

Sterling Engagements Wishes: Happy New Year!

Happy New Year!  
Wishing you and yours a Happy, Safe and EXTRA FUN Holiday! 


Looking forward to sharing the new year with all of our past, present and future clients to come! 


Friday, December 21, 2012

Sterling's 2012 Year-End Review


From our family to yours, we wish you a warm, joyful and extra special holiday as the season continues.   

Thank you for inviting us into your lives, special moments and celebrations.  Looking back on 2012, we continue to be humbled by our experiences with our loyal clients, vendors, friends and family.  It’s been an incredible year and our success could not be possible without you.  We are so grateful for all of your endless support, kindness and encouragement.   

Here are some of our favorite moments from the year!

Sarah and Matthew's Southern Wedding in Dallas, Texas!
Photo courtesy of Jessica D'Onofrio Photography

Kate and Rob's Epic Wedding at Cicada 
Photo courtesy of Von Swank Photography  

Corporate Opening Night Party for 4500 at The JW Marriott LA Live & Nokia Plaza   
Corporate After-Party for a Charity Concert featuring Diana Ross
Corporate Summit Multi-Room, Multi-Theme Closing Gala for 4500 guests
 Photos courtesy of Evoke Photography

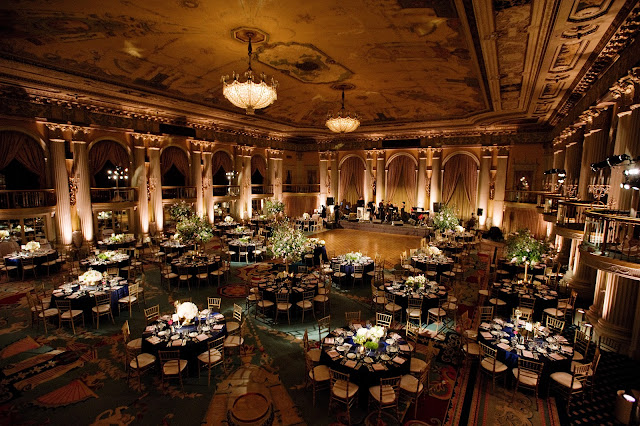
Emily and Saul's Enchanted Wedding at The Millennium Biltmore Downtown 
 Photo courtesy of Next Exit Photography  

Mirella and Scott's Multi-Ethnic Wedding at Vibiana
 Photo courtesy of Ryan Phillips Photography

BJ and Judie's Glamorous Old Hollywood Inspired Wedding at Majestic Halls
Photo courtesy of Callaway Gable Photography 

 Alexa and Evan's Rustic yet Elegant Wedding at The Bel-Air Bay Club
Photo courtesy of Ryan Phillips Photography

Jen and Marc's Modern Chic Wedding at The Bel-Air Bay Club
 Photo courtesy of Joy Marie Photography 

Jill and Jordan's Natural yet Modern Inspired Wedding at a Private Residence
Photo courtesy of Callaway Gable Photography 

Michelle and David's Rock Concert meets Carnival Inspired Wedding 


Video courtesy of Jennifer Ruiz

Amanda and Hal's High-Fashion Lavish yet Romantic Wedding at a Private Residence
Photo courtesy of Callaway Gable Photography 

 The 1st Annual Huddle Conference in Denver, CO
 Photo courtesy of Matthew Photography  

Myesha and Craig's Modern yet Whimsical Wedding at Cafe Pinot Downtown

Ani and Patrick's Gorgeous and Glamorous Wedding at the Natural History Museum
Photo courtesy of Kris Khan Photography  
 
Sammy's Music & Lyric Inspired Bar Mitzvah
Photo courtesy of Amber Event Production
 
Corporate Opening Party for 9000 Guests on a Rooftop in Long Beach Roaring Twenties Soiree for 2300 Guests at 
Jesse James' former West Coast Choppers Warehouse 
Photos courtesy of Callaway Gable Photography 

Daniel and Kolette's Rustic Elegant Fall Inspired Wedding 

Jessica and David's Elegantly Enchanted Vibiana Wedding
Photo courtesy of Docuvitae Photography

New Hollywood Glamour Opening Dinner for 550 Guests in a Parking Structure!

Old Hollywood Glamour Opening Dinner for 950 Guests in a Parking Structure!

A Holiday Journey through Space, Land, Sea and Fantasy Party for 1500 Guests 
Photos courtesy of Photography Christopher Todd Studios
 
We look forward to all that 2013 has to offer.  We cannot wait to design, create and produce extraordinary events for you and yours! 

Warmest Wishes,
Alexandra & The Sterling Engagements Team

Tuesday, November 20, 2012

DIY With Star: Salt Dough Beauties

With Thanksgiving only a few days away and Christmas music playing in every store you go into, the holidays are clearly upon us!  Every holiday season I like to make ornaments for our tree. This year I plan to make two different kinds (I'll post the second one soon :).  In addition to adorning our tree, I often tie my homemade ornaments to holiday gifts to give the wrapping a little uniqueness.  This year I was inspired to recreate grown up versions of the salt dough ornaments I made as a child.  It's been years since I made anything with salt dough and I must say, it was a lot of fun.  There is something wonderfully nostalgic about getting your hands sticky, rolling out the grainy dough and utilizing your cookie cutters for something other than cookies!

As you can tell by the colors I used for the ornaments, I am super into metallics this holiday season.  I've purchased various types of metallic gift wrap and I think these ornaments will look beautiful with them.  I plan to tie them to gifts and write people's names on the back in lieu of gift tags.  I love that these ornaments are not holiday specific and can be used for friends and family that celebrate Christmas or Hanukah.

These are obviously holiday inspired, but the idea of these simple ornaments could also be used as cute favors for a rustic garden wedding or shower.  You could stamp your initials and wedding date on them and paint them in your wedding colors.  You could also write your guests' names on them and use them as escort cards or at place settings.


DIY Salt Dough Ornaments

Supplies:
- 1/2 cup salt
- 1 cup flour
- 1/2 cups warm water
- Rolling pin
- Cookie cutters
- Skewer, toothpick or chopstick
- Non-stick baking sheet or parchment paper lined baking sheet
- Rubber stamps and ink (optional)

Directions:
Pre-heat oven to 250 degrees.  Combine water and salt, then add flour. Kneed the dough, adding more flour as needed.  Roll the dough out on a lightly floured surface to about 1/4" thick.  Using your cookie cutters (or cups or jars for perfect circles), cut shapes out of the dough and place on the baking sheet.  Use your skewer to poke a hole in the dough (make sure it is large enough to thread ribbon or string through).  If you choose to make impressions on your ornaments, use a rubber stamp (use ink for a colored impression or without ink for an impression only).  You can also experiment with using a toothpick to write letters or draw images.  Place the ornaments in the pre-heated oven and bake for an hour to an hour and a half, turning half way through.  Bake until the ornaments are firm, the thicker they are, the loner they will take to dry.  Let them cool completely before decorating further.


I happen to like the organic, rustic look of the stamped ornaments unpainted so I left a few of them that way.  If you like this look as well, I still recommend you coating them with a layer of Modge Podge to seal them.  I chose to paint the majority of my ornaments.  I used Martha Stewart's Metallic Acrylic Craft Paint in Light Gold and Champagne as well as Martha Stewart's Coarse Glitter Acrylic Craft Paint in Sterling.  I used sheer white ribbon for the smaller ornaments and beautiful satin silver ribbon for the larger ones.  I LOVE the way the silver ribbon looks!

Salt dough is not just for kids!  Happy crafting :)

-Star